| ATAQUE BÁSICO |
|---|
| Mihawk realiza um corte frontal com sua Espada Negra no alvo. |
 |
Mudanças entre as edições de "Mihawk (World Boss)"
Ir para navegação
Ir para pesquisar
| (15 revisões intermediárias por 6 usuários não estão sendo mostradas) | |||
| Linha 1: | Linha 1: | ||
[[Arquivo:Mihawk Banner.png|centro]] | [[Arquivo:Mihawk Banner.png|centro]] | ||
=Introdução= | |||
---- | |||
Mihawk, o Shichibukai e o melhor espadachim do mundo, foi avistado perto do Baratie. | |||
Essa notícia se espalhou rapidamente por todo o mundo, causando um grande alvoroço. Mihawk é um homem temido e respeitado, e seu desafio é uma oportunidade única para os jogadores mais fortes do jogo. | |||
=Informações Importantes= | |||
---- | |||
* Não haverá punição ao ser derrotado pelo boss. | |||
* O desafio é feito em grupo de 6 jogadores. | |||
* Leve sempre foods de cura instantânea. | |||
* Fiquem sempre atentos as rotações dele, pois o seu dano é muito alto, mínimos erros podem ser fatais. | |||
* A pontuação será formada pelo dano total causado pelo grupo. | |||
* As recompensas são concedidas após 22 horas de batalha com o chefe. | |||
* Habilidade invulnerável é essencial para evitar Kokuto Arahoshi (M8) | |||
* Suihei é um ataque em área que pode ser Esquivado ou causa dano em 6 SQM. | |||
* Mihawk pode teleportar durante o combate, mas não é o mesmo teleporte das fases 1 e 4. | |||
* Mihawk é agressivo e forte, então é preciso tank. | |||
* Personagens à distância não são recomendados, pois o Mihawk reflete o dano em algumas fases. | |||
==Fases== | |||
<center> | <center> | ||
{| class="wikitable" style="width:70%; text-align: center; | {| class="wikitable" style="width:70%; text-align: center; | ||
|+ | |+ | ||
| Linha 14: | Linha 35: | ||
|Fase 1 | |Fase 1 | ||
|Fase inicial | |Fase inicial | ||
| | |Teleporte | ||
|- | |- | ||
|Fase 2 | |Fase 2 | ||
| | | * | ||
|Dois Avanços Frontais | |Dois Avanços Frontais | ||
|- | |- | ||
|Fase 3 | |Fase 3 | ||
| | | * | ||
|Dois Avanços Frontais, Waves com DOIS Piratas | |Dois Avanços Frontais, Waves com DOIS Piratas | ||
|- | |- | ||
|Fase 4 | |Fase 4 | ||
| | | * | ||
| | |Teleporte, Waves com QUATRO Piratas | ||
|- | |- | ||
|Fase 5 | |Fase 5 | ||
| | | * | ||
| | |Retângulo Verde (SUIHEI), Waves com QUATRO Piratas | ||
|- | |- | ||
|Fase 6 | |Fase 6 | ||
| | | * | ||
|Avanço Frontal, Suihei (M2), Chi | |Avanço Frontal, Suihei (M2), Chi Wo Hau Zangeki (M3) | ||
|- | |- | ||
|Fase 7 | |Fase 7 | ||
| | | * | ||
|Kokuto Issen (M5), Avanço Frontal, Suihei (M2), Chi | |Kokuto Issen (M5), Avanço Frontal, Suihei (M2), Chi Wo Hau Zangeki (M3) | ||
|- | |- | ||
|Fase 8 | |Fase 8 | ||
| | | * | ||
|Avanço Frontal, Suihei (M2), Chi | |Avanço Frontal, Suihei (M2), Chi Wo Hau Zangeki (M3) | ||
|- | |- | ||
|Fase 9 | |Fase 9 | ||
| | | * | ||
| | |Dois Retângulos Verde (SUIHEI), Avanço Frontal, Suihei (M2), Chi Wo Hau Zangeki (M3) | ||
|- | |- | ||
|Fase 10 | |Fase 10 | ||
| | | * | ||
|Kokuto Issen (M5), Avanço Frontal, Suihei (M2), Chi | |Kokuto Issen (M5), Avanço Frontal, Suihei (M2), Chi Wo Hau Zangeki (M3) | ||
|- | |||
|} | |} | ||
</center> | |||
==Localização== | |||
O ícone [[Arquivo:Iconezinho_worldboss.png|25x23px|link=]] no mapa indica a localização do Mihawk. | |||
{{DISPLAYTITLE:<span style="position: absolute; clip: rect(1px 1px 1px 1px); clip: rect(1px, 1px, 1px, 1px);">{{FULLPAGENAME}}</span>}} | |||
<center>{{Worldboss box|title=|icon=|content= <table style="width:100%; style="margin-left: auto; margin-right: auto; text-align: center;"> | |||
'''Baratie''' | |||
[[Arquivo:Mihawklocalização.png|centro|link=]] | |||
</table> | |||
}} | |||
</center> | |||
=Personagens Recomendados= | |||
---- | |||
Faremos abaixo algumas recomendações de personagens que podem ser usados para o desafio. É importante ressaltar que estas são apenas sugestões, e outros personagens também podem ser utilizados. | |||
== [[Arquivo:Simbolo tank.png|link=]] Tanque == | |||
[[Arquivo:Card-jinbe.png|150x150px|link=https://wiki.gla.com.br/index.php/Jinbe]] | |||
[[Arquivo:Card-kid.png|150x150px|link=https://wiki.gla.com.br/index.php/Kid]] | |||
[[Arquivo:Card-bastille.png|150x150px|link=https://wiki.gla.com.br/index.php/Bastille]] | |||
== [[Arquivo:Simbolo_dps.png|link=]] Causador de Dano== | |||
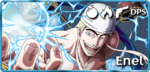
[[Arquivo:Enel_card.png|150x150px|link=https://wiki.gla.com.br/index.php/Enel]] | |||
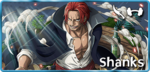
[[Arquivo:Card-shanks.png|150x150px|link=https://wiki.gla.com.br/index.php/Shanks]] | |||
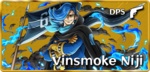
[[Arquivo:Card-niji.png|150x150px|link=https://wiki.gla.com.br/index.php/Niji]] | |||
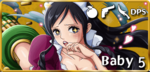
[[Arquivo:Baby5_card.png|150x150px|link=https://wiki.gla.com.br/index.php/Baby_5]] | |||
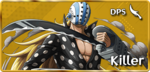
[[Arquivo:Card-killer.png|150x150px|link=https://wiki.gla.com.br/index.php/Killer]] | |||
==[[Arquivo:Simbolo sup.png|link=]] Suporte== | |||
[[Arquivo:Card-ivankov.png|150x150px|link=https://wiki.gla.com.br/index.php/Ivankov]] | |||
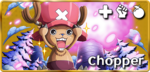
[[Arquivo:Card-chopper.png|150x150px|link=https://wiki.gla.com.br/index.php/Chopper]] | |||
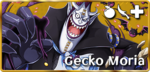
[[Arquivo:Moria_card.png|150x150px|link=https://wiki.gla.com.br/index.php/Gecko_Moria]] | |||
=Mecânicas= | |||
---- | |||
Explicações detalhadas de cada mecânica do boss Mihawk: | Explicações detalhadas de cada mecânica do boss Mihawk: | ||
<center class="center-tab"><tabber> | <center class="center-tab"><tabber> | ||
|-|Ataque Básico= | |-|Ataque Básico= | ||
| Linha 86: | Linha 147: | ||
|Mihawk dá um grande avanço em uma reta com seu dash. Todos os alvos que ele passar irão sofrer dano. | |Mihawk dá um grande avanço em uma reta com seu dash. Todos os alvos que ele passar irão sofrer dano. | ||
|- | |- | ||
|[[Arquivo:DashMihawk.gif | |[[Arquivo:DashMihawk.gif|center|DashMihawk.gif]] | ||
|} | |} | ||
| Linha 116: | Linha 177: | ||
|Caso ninguém prove sua determinação e enfrente o corte de Mihawk, o boss irá atacar um alvo aleatório com seu poderoso golpe Kokuto Arahoshi, causando toneladas de danos em uma grande área. | |Caso ninguém prove sua determinação e enfrente o corte de Mihawk, o boss irá atacar um alvo aleatório com seu poderoso golpe Kokuto Arahoshi, causando toneladas de danos em uma grande área. | ||
|- | |- | ||
| | |[[Arquivo:WBMihawkArahoshi.gif|center|=link]] | ||
|} | |} | ||
| Linha 149: | Linha 210: | ||
|} | |} | ||
</tabber></center> | </tabber> | ||
<center> | </center> | ||
{| class="wikitable" style="width: | |||
| | =Recompensas= | ||
<center class="center-tab"><tabber> | |||
|-|1° Lugar= | |||
{| class="wikitable" style="width:30%; | |||
|- | |||
! Recompensas | |||
! Quantidade | |||
|- | |||
| aling="left" | [[Arquivo:FoilMihawk.gif|30x30px|AokijiFoil.gif|link=]] Ícones exclusivo | |||
| <center>1 | |||
|- | |||
| aling="center"| [[Arquivo:Awakening stone.png|30x30px|Awakening stone.png|link=]] Pedra do Despertar | |||
| <center>4 | |||
|- | |||
| aling="center" | [[Arquivo:Diamond medal.gif|30x30px|Diamond medal.png|link=]] Medalha Dinâmica de Diamante | |||
| <center>5 | |||
|- | |||
| aling="center" | [[Arquivo:Item charakey.png|30x30px|Item charakey.png|link=]] Chave | |||
| <center>1 | |||
|- | |||
| aling="center" | [[Arquivo:Crimson crystal.png|30x30px|Crimson crystal.png|link=]] Cristal Carmesin | |||
| <center>10 | |||
|- | |||
| aling="center" | [[Arquivo:Sage crystal.png|30x30px|Sage crystal.png|link=]] Cristal do Sábio | |||
| <center>15 | |||
|- | |||
| aling="center" | [[Arquivo:CaixaRara.png|30x30px|CaixaRara.png|link=]] Caixa de Recompensa Rara | |||
| <center>5 | |||
|- | |||
| aling="center" | [[Arquivo:Gold berry.png|30x30px|Gold berry.png|link=]] Berry de Ouro | |||
| <center>10 | |||
|- | |||
| aling="center" | [[Arquivo:Stamina potion.png|30x30px|Stamina potion.png|link=]] Poção de Stamina (East Blue) | |||
| <center>4 | |||
|- | |||
| aling="center" | [[Arquivo:Gl stamina pot.png|30x30px|Gl stamina pot.png|link=]] Poção de Stamina (Grand Line) | |||
| <center>4 | |||
|- | |||
| aling="center" | [[Arquivo:ValorMedal.png|30x30px|ValorMedal.png|link=]] Medalha de Valentia | |||
| <center>35 | |||
|- | |- | ||
|[[Arquivo: | | aling="center" | [[Arquivo:Mihawkswordartefato.png|40px|Aokijisword.png|link=]] Fragmentos de Artefato | ||
| <center>10 | |||
|} | |} | ||
|-|2° ao 5° Lugar= | |||
{| class="wikitable" style="width:30%; | |||
|- | |||
! Recompensas | |||
! Quantidade | |||
|- | |||
| aling="center"| [[Arquivo:Awakening stone.png|30x30px|Awakening stone.png|link=]] Pedra do Despertar | |||
| <center>2 | |||
|- | |||
| aling="center" | [[Arquivo:Diamond medal.gif|30x30px|Diamond medal.png|link=]] Medalha Dinâmica de Diamante | |||
| <center>3 | |||
|- | |||
| aling="center" | [[Arquivo:Item charakey.png|30x30px|Item charakey.png|link=]] Chave | |||
| <center>1 | |||
|- | |||
| aling="center" | [[Arquivo:Crimson crystal.png|30x30px|Crimson crystal.png|link=]] Cristal Carmesin | |||
| <center>5 | |||
|- | |||
| aling="center" | [[Arquivo:Sage crystal.png|30x30px|Sage crystal.png|link=]] Cristal do Sábio | |||
| <center>15 | |||
|- | |||
| aling="center" | [[Arquivo:CaixaRara.png|30x30px|CaixaRara.png|link=]] Caixa de Recompensa Rara | |||
| <center>3 | |||
|- | |||
| aling="center" | [[Arquivo:Gold berry.png|30x30px|Gold berry.png|link=]] Berry de Ouro | |||
| <center>5 | |||
|- | |||
| aling="center" | [[Arquivo:Stamina potion.png|30x30px|Stamina potion.png|link=]] Poção de Stamina (East Blue) | |||
| <center>4 | |||
|- | |||
| aling="center" | [[Arquivo:Gl stamina pot.png|30x30px|Gl stamina pot.png|link=]] Poção de Stamina (Grand Line) | |||
| <center>4 | |||
|- | |||
| aling="center" | [[Arquivo:ValorMedal.png|30x30px|ValorMedal.png|link=]] Medalha de Valentia | |||
| <center>30 | |||
|- | |||
| aling="center" | [[Arquivo:Mihawkswordartefato.png|40px|Aokijisword.png|link=]] Fragmentos de Artefato | |||
| <center>5 | |||
|} | |||
- | |-|6° ao 20° Lugar= | ||
{| class="wikitable" style="width:30%; | |||
|- | |||
! Recompensas | |||
! Quantidade | |||
|- | |||
| aling="center"| [[Arquivo:Awakening stone.png|30x30px|Awakening stone.png|link=]] Pedra do Despertar | |||
| <center>1 | |||
|- | |||
| aling="center" | [[Arquivo:Diamond medal.png|30x30px|Diamond medal.png|link=]] Medalha Dinâmica de Diamante | |||
| <center>1 | |||
|- | |||
| aling="center" | [[Arquivo:Item charakey.png|30x30px|Item charakey.png|link=]] Chave | |||
| <center>1 | |||
|- | |||
| aling="center" | [[Arquivo:Sage crystal.png|30x30px|Sage crystal.png|link=]] Cristal do Sábio | |||
| <center>10 | |||
|- | |||
| aling="center" | [[Arquivo:Sky crystal.png|30x30px|Sky crystal.png|link=]] Cristal do Céu | |||
| <center>10 | |||
|- | |||
| aling="center" | [[Arquivo:CaixaRara.png|30x30px|CaixaRara.png|link=]] Caixa de Recompensa Rara | |||
| <center>2 | |||
|- | |||
| aling="center" | [[Arquivo:Normal_chest.png|30x30px|Normal_chest.png|link=]] Caixa de Recompensa | |||
| <center>1 | |||
|- | |||
| aling="center" | [[Arquivo:Gold berry.png|30x30px|Gold berry.png|link=]] Berry de Ouro | |||
| <center>3 | |||
|- | |||
| aling="center" | [[Arquivo:Stamina potion.png|30x30px|Stamina potion.png|link=]] Poção de Stamina (East Blue) | |||
| <center>4 | |||
|- | |||
| aling="center" | [[Arquivo:Gl stamina pot.png|30x30px|Gl stamina pot.png|link=]] Poção de Stamina (Grand Line) | |||
| <center>4 | |||
|- | |||
| aling="center" | [[Arquivo:ValorMedal.png|30x30px|ValorMedal.png|link=]] Medalha de Valentia | |||
| <center>20 | |||
|- | |||
| aling="center" | [[Arquivo:Mihawkswordartefato.png|40px|Aokijisword.png|link=]] Fragmentos de Artefato | |||
| <center>1 | |||
|} | |||
- | |-|21° ao 80° Lugar= | ||
{| class="wikitable" style="width:30%; | |||
|- | |||
! Recompensas | |||
! Quantidade | |||
|- | |||
| aling="center" | [[Arquivo:Item charakey.png|30x30px|Item charakey.png|link=]] Chave | |||
| <center>1 | |||
|- | |||
| aling="center" | [[Arquivo:Sage crystal.png|30x30px|Sage crystal.png|link=]] Cristal do Sábio | |||
| <center>8 | |||
|- | |||
| aling="center" | [[Arquivo:Sky crystal.png|30x30px|Sky crystal.png|link=]] Cristal do Céu | |||
| <center>8 | |||
|- | |||
| aling="center" | [[Arquivo:CaixaRara.png|30x30px|CaixaRara.png|link=]] Caixa de Recompensa Rara | |||
| <center>1 | |||
|- | |||
| aling="center" | [[Arquivo:Normal_chest.png|30x30px|Normal_chest.png|link=]] Caixa de Recompensa | |||
| <center>2 | |||
|- | |||
| aling="center" | [[Arquivo:Gold berry.png|30x30px|Gold berry.png|link=]] Berry de Ouro | |||
| <center>2 | |||
|- | |||
| aling="center" | [[Arquivo:Stamina potion.png|30x30px|Stamina potion.png|link=]] Poção de Stamina (East Blue) | |||
| <center>4 | |||
|- | |||
| aling="center" | [[Arquivo:Gl stamina pot.png|30x30px|Gl stamina pot.png|link=]] Poção de Stamina (Grand Line) | |||
| <center>4 | |||
|- | |||
| aling="center" | [[Arquivo:ValorMedal.png|30x30px|ValorMedal.png|link=]] Medalha de Valentia | |||
| <center>10 | |||
|} | |||
- | |-|81° ao 150° Lugar= | ||
{| class="wikitable" style="width:30%; | |||
|- | |||
! Recompensas | |||
! Quantidade | |||
|- | |||
| aling="center" | [[Arquivo:Item charakey.png|30x30px|Item charakey.png|link=]] Chave | |||
| <center>1 | |||
|- | |||
| aling="center" | [[Arquivo:Sky crystal.png|30x30px|Sky crystal.png|link=]] Cristal do Céu | |||
| <center>8 | |||
|- | |||
| aling="center" | [[Arquivo:CaixaRara.png|30x30px|CaixaRara.png|link=]] Caixa de Recompensa Rara | |||
| <center>1 | |||
|- | |||
| aling="center" | [[Arquivo:Normal_chest.png|30x30px|Normal_chest.png|link=]] Caixa de Recompensa | |||
| <center>1 | |||
|- | |||
| aling="center" | [[Arquivo:Gold berry.png|30x30px|Gold berry.png|link=]] Berry de Ouro | |||
| <center>1 | |||
|- | |||
| aling="center" | [[Arquivo:Stamina potion.png|30x30px|Stamina potion.png|link=]] Poção de Stamina (East Blue) | |||
| <center>4 | |||
|- | |||
| aling="center" | [[Arquivo:Gl stamina pot.png|30x30px|Gl stamina pot.png|link=]] Poção de Stamina (Grand Line) | |||
| <center>4 | |||
|- | |||
| aling="center" | [[Arquivo:ValorMedal.png|30x30px|ValorMedal.png|link=]] Medalha de Valentia | |||
| <center>5 | |||
|} | |||
- | |-|151° ao 300° Lugar= | ||
{| class="wikitable" style="width:30%; | |||
|- | |||
! Recompensas | |||
! Quantidade | |||
|- | |||
| aling="center" | [[Arquivo:Item charakey.png|30x30px|Item charakey.png|link=]] Chave | |||
| <center>1 | |||
|- | |||
| aling="center" | [[Arquivo:Sky crystal.png|30x30px|Sky crystal.png|link=]] Cristal do Céu | |||
| <center>4 | |||
|- | |||
| aling="center" | [[Arquivo:Normal_chest.png|30x30px|Normal_chest.png|link=]] Caixa de Recompensa | |||
| <center>2 | |||
|- | |||
| aling="center" | [[Arquivo:Silver_berry.png|30x30px|Silver_berry.png|link=]] Berry de Prata | |||
| <center>50 | |||
|- | |||
| aling="center" | [[Arquivo:Stamina potion.png|30x30px|Stamina potion.png|link=]] Poção de Stamina (East Blue) | |||
| <center>4 | |||
|- | |||
| aling="center" | [[Arquivo:Gl stamina pot.png|30x30px|Gl stamina pot.png|link=]] Poção de Stamina (Grand Line) | |||
| <center>4 | |||
|} | |||
|-|Maior que 301° Lugar= | |||
{| class="wikitable" style="width:30%; | |||
|- | |||
! Recompensas | |||
! Quantidade | |||
|- | |||
| aling="center" | [[Arquivo:Item charakey.png|30x30px|Item charakey.png|link=]] Chave | |||
| <center>1 | |||
|- | |||
| aling="center" | [[Arquivo:Normal_chest.png|30x30px|Normal_chest.png|link=]] Caixa de Recompensa | |||
| <center>1 | |||
|- | |||
| aling="center" | [[Arquivo:Silver_berry.png|30x30px|Silver_berry.png|link=]] Berry de Prata | |||
| <center>50 | |||
|- | |||
| aling="center" | [[Arquivo:Stamina potion.png|30x30px|Stamina potion.png|link=]] Poção de Stamina (East Blue) | |||
| <center>4 | |||
|- | |||
| aling="center" | [[Arquivo:Gl stamina pot.png|30x30px|Gl stamina pot.png|link=]] Poção de Stamina (Grand Line) | |||
| <center>4 | |||
|} | |||
</tabber></center> | |||
<center> | |||
{{Worldboss}} | |||
</center> | </center> | ||
Edição atual tal como às 11h35min de 16 de janeiro de 2024

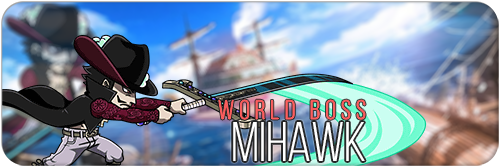
Introdução
Mihawk, o Shichibukai e o melhor espadachim do mundo, foi avistado perto do Baratie.
Essa notícia se espalhou rapidamente por todo o mundo, causando um grande alvoroço. Mihawk é um homem temido e respeitado, e seu desafio é uma oportunidade única para os jogadores mais fortes do jogo.
Informações Importantes
- Não haverá punição ao ser derrotado pelo boss.
- O desafio é feito em grupo de 6 jogadores.
- Leve sempre foods de cura instantânea.
- Fiquem sempre atentos as rotações dele, pois o seu dano é muito alto, mínimos erros podem ser fatais.
- A pontuação será formada pelo dano total causado pelo grupo.
- As recompensas são concedidas após 22 horas de batalha com o chefe.
- Habilidade invulnerável é essencial para evitar Kokuto Arahoshi (M8)
- Suihei é um ataque em área que pode ser Esquivado ou causa dano em 6 SQM.
- Mihawk pode teleportar durante o combate, mas não é o mesmo teleporte das fases 1 e 4.
- Mihawk é agressivo e forte, então é preciso tank.
- Personagens à distância não são recomendados, pois o Mihawk reflete o dano em algumas fases.
Fases
| FASES | DANO APROXIMADO | HABILIDADES |
|---|---|---|
| Fase 1 | Fase inicial | Teleporte |
| Fase 2 | * | Dois Avanços Frontais |
| Fase 3 | * | Dois Avanços Frontais, Waves com DOIS Piratas |
| Fase 4 | * | Teleporte, Waves com QUATRO Piratas |
| Fase 5 | * | Retângulo Verde (SUIHEI), Waves com QUATRO Piratas |
| Fase 6 | * | Avanço Frontal, Suihei (M2), Chi Wo Hau Zangeki (M3) |
| Fase 7 | * | Kokuto Issen (M5), Avanço Frontal, Suihei (M2), Chi Wo Hau Zangeki (M3) |
| Fase 8 | * | Avanço Frontal, Suihei (M2), Chi Wo Hau Zangeki (M3) |
| Fase 9 | * | Dois Retângulos Verde (SUIHEI), Avanço Frontal, Suihei (M2), Chi Wo Hau Zangeki (M3) |
| Fase 10 | * | Kokuto Issen (M5), Avanço Frontal, Suihei (M2), Chi Wo Hau Zangeki (M3) |
Localização
O ícone ![]() no mapa indica a localização do Mihawk.
no mapa indica a localização do Mihawk.
Baratie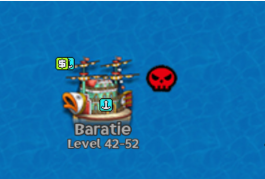
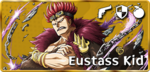
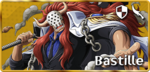
Personagens Recomendados
Faremos abaixo algumas recomendações de personagens que podem ser usados para o desafio. É importante ressaltar que estas são apenas sugestões, e outros personagens também podem ser utilizados.
 Tanque

 Causador de Dano
 Suporte

Mecânicas
Explicações detalhadas de cada mecânica do boss Mihawk:
| TELEPORTES |
|---|
| Mihawk começa a se mover tão rapidamente que parece que ele está teleportando pelo mapa. Em alguns momentos ele vai dar uma parada, aproveite para bater nele, caso ele não receba nenhum dano por alguns segundos, ele irá cortar um alvo e causar hit kill. |
 |
| AVANÇO FRONTAL |
|---|
| Mihawk dá um grande avanço em uma reta com seu dash. Todos os alvos que ele passar irão sofrer dano. |
 |
| WAVES DE PIRATAS |
|---|
| Piratas do infame Don Krieg sobem a bordo e começam a atirar contra os jogadores. Mihawk é capaz de cortar seus tiros em 2 pedaços, causando danos em seus alvos. Elimine os piratas o mais rápido possível. |
 |
| RETÂNGULO VERDE |
|---|
| Mihawk desafia seus inimigos a receber um de seus cortes, simbolizando o local em que irá desferir o ataque. É EXTREMAMENTE IMPORTANTE que alguém (de preferência o tank) receba o ataque com seu invulnerável, pois isso dá IK (morte instantânea). Caso Mihawk não corte ninguém, ele irá avançar em algum alvo aleatoriamente com sua habilidade Kokuto Arahoshi (M8), causando um grande dano em uma área imensa. |
 |
| KOKUTO ARAHOSHI |
|---|
| Caso ninguém prove sua determinação e enfrente o corte de Mihawk, o boss irá atacar um alvo aleatório com seu poderoso golpe Kokuto Arahoshi, causando toneladas de danos em uma grande área. |
 |
| SUIHEI |
|---|
| Mihawk realiza um corte horizontal, causando dano em todos os inimigos a sua frente. Para desviar, basta dar uma diagonal para direção oposta do Mihawk. |
 |
| CHI WO HAU ZANGEKI |
|---|
| Mihawk segura sua espada e lança um massivo corte no ar em direção do seu oponente, capaz de cortar até mesmo os objetos mais fortes. Para desviar, basta sair da reta. |
 |
| KOKUTO ISSEN |
|---|
| Mihawk começa a se teleportar pelos cantos do barco e lançar incansáveis golpes poderosos com sua espada. A área deste ataque é muito grande e para desviar basta sair da marcação em vermelho. |
 |
Recompensas
| Recompensas | Quantidade |
|---|---|
| Recompensas | Quantidade |
|---|---|
| Recompensas | Quantidade |
|---|---|
| Recompensas | Quantidade |
|---|---|
| Recompensas | Quantidade |
|---|---|
| Recompensas | Quantidade |
|---|---|
| Recompensas | Quantidade |
|---|---|
| World Boss |
|---|
| Bananawani • Hiking Bear • Byakko • Shai-Hulud • Plesiosaur • Mihawk • Aokiji |